USER GUIDE: MULTIGROUPING IN ADOBE PREMIERE
This user guide teaches Assistant Editors how to create synced sequences with two or more cameras in Adobe Premiere. The process involves two steps:
-
Create sequences for each camera
-
Combine single camera sequences into a master sequence
NOTE: This process works only with jam-synced cameras and audio.
Create Single-Camera Sequences
Follow the steps below to create single-camera sequences.
-
Copy a scene’s camera and audio clips to a single work bin. Label the bin with the scene name and date.
-
Sort the clips from each camera into assigned folders within the work bin. Label each folder with the camera name: A-Camera, B-Camera, and so on.
-
Move the field audio clips to a folder within the work bin. Label the folder Audio.
-
Label the field audio clips with a different color than the camera clips, if needed. Premiere may have done this automatically.
-
Open the A-Camera and Audio folders. Highlight all the clips in both folders.
-
Right click the highlighted clips. Select Create Multi-Cam Source Sequence to open the Create Multi-Camera Source Sequence pop-up box.
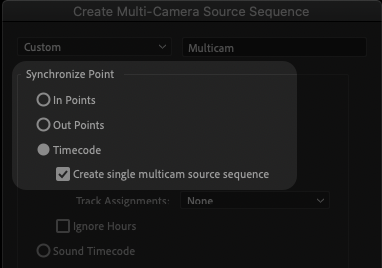
Fig. 1: Timecode Settings for Single-Camera Sequence -
Select Timecode under Synchronize Point. See Fig. 1 above for this setting.
-
Select Create single multicam source sequence in the checkbox under Timecode. See Fig. 1 above for this setting.
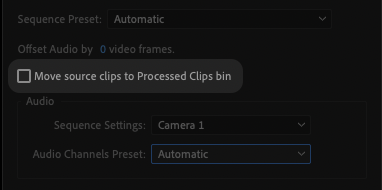
Fig. 2: Move Source Clips Settings -
Uncheck the box labelled Move source clips to Processed Clips bin. See Fig. 2 above for this setting.
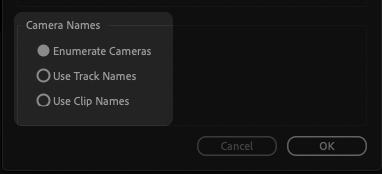
Fig. 3: Camera Name Settings -
Select Enumerate Cameras under Camera Names. See Fig. 3 above for this setting.
-
Use defaults for all other settings. See Fig. 4 below for full multi-camera settings. Double-check that your settings match those in Fig. 4.
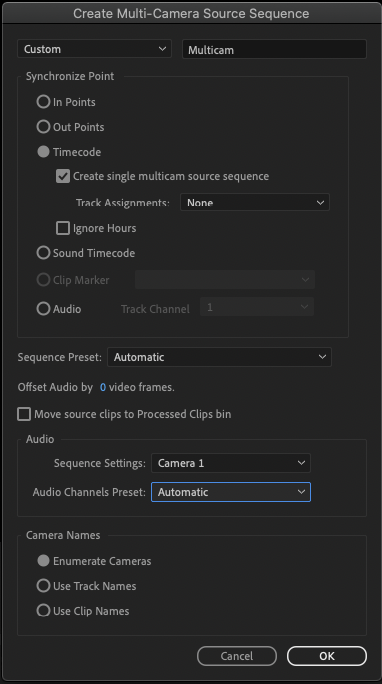
Fig 4: Full Multi-Camera Source Settings -
Click OK at the bottom of the pop-up box to create your A-Camera sequence.
-
Navigate back to your work bin and right click the A-Camera sequence. Select Open in Timeline in the dropdown menu.
-
Scrub through the A-Camera sequence and fix any out-of-sync clips.
-
Relabel the A-Camera sequence as your master scene sequence. Save this sequence. You will add the remaining camera clips to this sequence in the next section.
-
Repeat Steps 5–14 with your B-Camera clips, and with any additional camera clips if applicable.
Create Multi-Camera Sequence
Follow the steps below to combine your single-camera sequences into a multi-camera master sequence.
-
Open your B-Camera sequence in the timeline. Highlight the camera clips on V1. Leave the audio unselected.
-
Move the playhead to the first frame of the timeline. Write down the timecode displayed in the top left of the timeline window. See Fig. 5 below for an example.
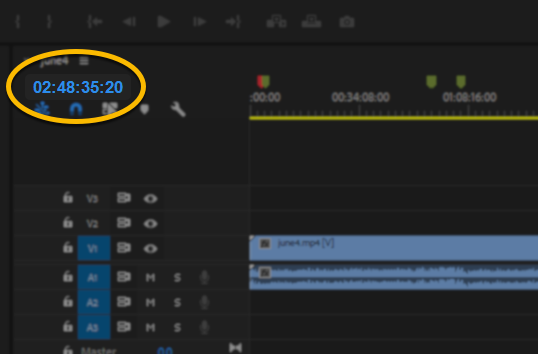
Fig. 5: Premiere Sequence Timecode -
Copy the B-Camera clips from the timeline by typing Command + C (Mac) or Ctrl + C (Windows).
-
Open your master sequence in the timeline. (This is the A-Camera master sequence you saved in Step 15 of the Previous Section.)
-
Right click below the master sequence timecode and select Add Tracks… In the Add Tracks pop-up box, add a new video track (V2) to the master sequence. Click OK to save and exit. See Fig. 6 below for these settings.
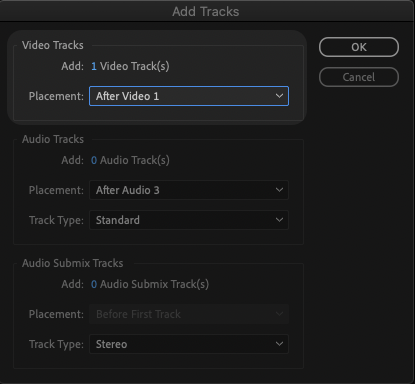
Fig. 6: Add Tracks Settings -
Move the master sequence playhead to the timecode you wrote down in Step 2.
-
Select video track V2 on the left of the timeline, then paste the B-Camera clips to V2.
-
Sync the B-Camera clips to the A-Camera and audio. You may only need to move a few clips, depending on the jam sync.
-
Repeat Steps 1–8 for any additional cameras, if applicable.
-
Zoom in fully on your master sequence by clicking and dragging the zoom slider below the timeline. See Fig. 7 below.
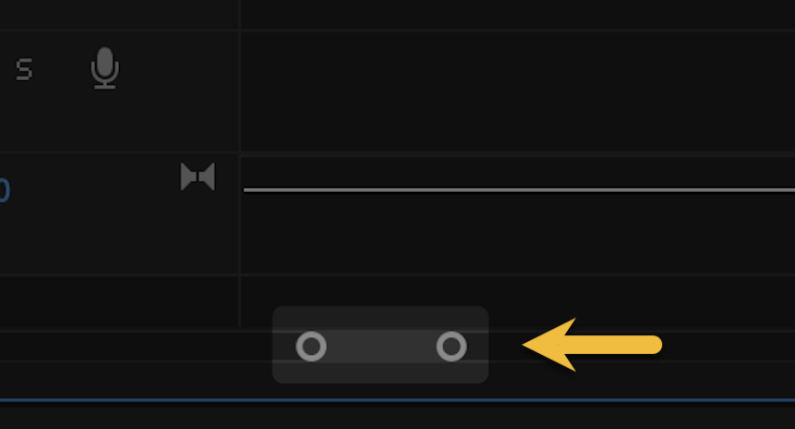
Fig. 7: Timeline Zoom Slider -
Carefully scrub through your master sequence and delete all camera audio, leaving only external field audio. Camera audio may appear in single-frame gaps between two field audio clips. See Fig. 8 below for an example.
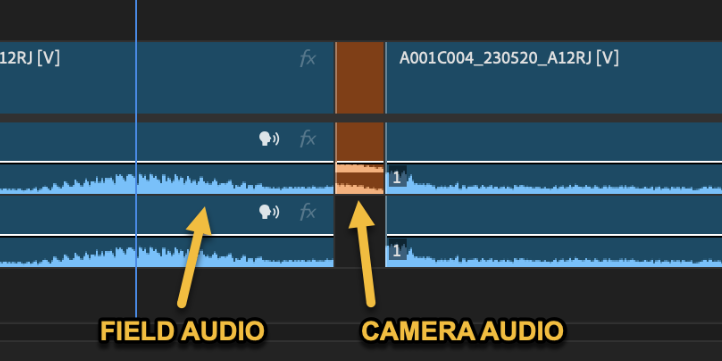
Fig. 8: Camera Audio Between Field Audio Clips NOTE: You must complete Step 11 to ensure that all audio waveforms appear in your project. Any camera audio present in your sequence prevents its waveforms from displaying.
-
Double-check that your master sequence is complete and fully synced.
-
Load your master sequence into the source monitor. Splice a clip from the source monitor into an empty timeline.
-
Double-check the clip in the timeline for the following:
- You can see the clip’s audio waveforms
- You can hear the clip’s audio
- You can switch between cameras on the clip’s video track